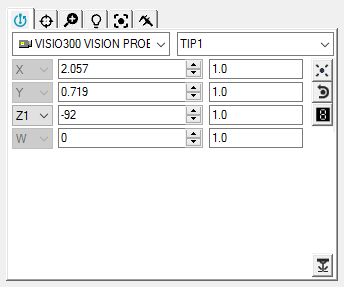
Probe Toolbox - Position Probe tab
You can use the Position Probe tab to act like a "Virtual Joystick" to position the probe or camera so that it is over the feature that you want to measure.
To position your vision probe, follow these steps:
Adjust the Increment Value
in the Increment edit box  to specify the amount that the value in the Current Position edit box increases or decreases.
Click the Up and Down arrows to change the value in the Current Position edit box. This causes your Vision Probe to move in real-time by the specified value. Alternately, you can type the value and press Enter to cause your Vision Probe to move.
For machines with multiple axis (such as two rotary tables), it also selects the currently active rotary table.
If you don't see any information in the Probes and Probe Tips lists of the Probe Toolbox, you need to first define a probe. For information on how to define a probe, see the "Defining Probes" chapter in the PC-DMIS Core documentation.
Since you can use this tab with all probe types (contact, laser, or optical), this PC-DMIS Vision documentation covers only PC-DMIS Vision related items. For information about the toolbox as it relates to probes in general, see "Using the Probe Toolbox" in the PC-DMIS Core documentation.
Position Probe Tab Buttons
|
Click the Take a Hit button to measure an edge point at the center of the Field of View. The edge point must be within a 60-pixel range of the center of the Field of View to be measured. |
|
Click the Remove a Hit button to remove the anchor point hit you just took using the left mouse. This button remains disabled until you enter an anchor point hit. |
|
Click the Probe Readouts button to display the Probe Readouts window. You can re-size or relocate this window. See the "Using the Probe Readouts Window with Optical Probes" topic. |
|
The Laser On/Off button is available for systems with a laser probe or laser pointer fitted (for example, TESA VISIO 300 and 500). This button toggles the laser on and off. |
More:


