You can use the Protractor gage to determine the (X & Y) location of the Gage Apex as well as the Included Angle as read from the Gage tab of the Probe Toolbox or the corner of the Vision tab.
|
You can use the Protractor gage to determine the (X & Y) location of the Gage Apex as well as the Included Angle as read from the Gage tab of the Probe Toolbox or the corner of the Vision tab. |
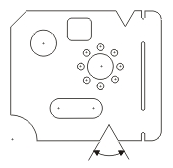
For information on controlling the Cross Hair gage, see the "Rotating,
Sizing, or Moving Gages" topic.
Protractor Gage Example
To measure the included angle:
Open the Probe Readout window (Ctrl + W).
From the Probe Toolbox, adjust the magnification and lighting as needed. See "Probe Toolbox: Magnification tab" and "Probe Toolbox: Illumination tab".
From the Gage tab of the Probe Toolbox, select the Protractor Gage option from the drop-down list.
Move the machine so the angle is within the FOV. When the machine is close, you can optionally drag the protractor gage, so the apex lies on top of the feature's apex.
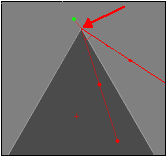
The 2 apexes should coincide
Use the center dots on the two legs to rotate them coincident with the sides of the feature.
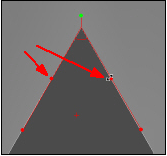
Read the Included Angle value as displayed in the corner of the Live View. This value is also found in the Gage tab of the Probe Toolbox.