Step 24: Best Practices
This final topic of the tutorial discusses some recommended
best practices.
Auto Features
If you intend to work with Auto features, it's best
to turn on some options for each feature type you intend to use in your
routine.
Select Insert | Feature
| Auto, and then choose a feature type to access the Auto Feature dialog box for that feature.
From the Measurement Properties
area, turn on these options:
 Circular Moves - Makes the path lines
more circular around circular features.
Circular Moves - Makes the path lines
more circular around circular features.
 Auto Wrist - Automatically picks the best
probe angle for your feature.
Auto Wrist - Automatically picks the best
probe angle for your feature.
 Void Detection - PC-DMIS detects hits
that would be taken in empty space and repositions them.
Void Detection - PC-DMIS detects hits
that would be taken in empty space and repositions them.
When you're done, click Close
to close the Auto Feature dialog box. The
next time you create that feature, PC-DMIS uses those changes.
To see the Auto feature best practices in action, do
the following:
Turn on the above items for a Cylinder Auto
feature.
Ensure that surfaces are not selected.
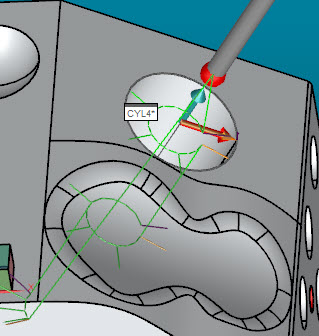
Press Shift and click on the inner cylinder
on the slanted surface on the top face.

The animated probe in the
Graphic Display window positions itself in the cylinder. The software
displays the Auto Wrist dialog box to select
the best angle:

Click OK to add CYL4
into the routine and close the Auto Wrist
dialog box.
From the Edit window, select the CYL4
feature and press F9. You can see that the path lines between the
hits use a curve instead of a straight line:
Move Points
When you want to end a measurement routine, use MOVE/POINT commands at the end of the
routine to move the probe to a safe position for future routines or measurements.
Congratulations! You’ve finished the tutorial.