Select a Surface probe.
Open the Area Scan
dialog box from the menu (Insert | Scan | Area
Scan) or from the Tracker Measure
toolbar, click the Area Scan button ( ).
).
To perform an Area Scan from the Area Scan dialog box and create the Area Scan command, follow these steps:
Select a Surface probe.
Open the Area Scan
dialog box from the menu (Insert | Scan | Area
Scan) or from the Tracker Measure
toolbar, click the Area Scan button ().
From the Area Scan dialog box, you can use these three methods to create an Area Scan:
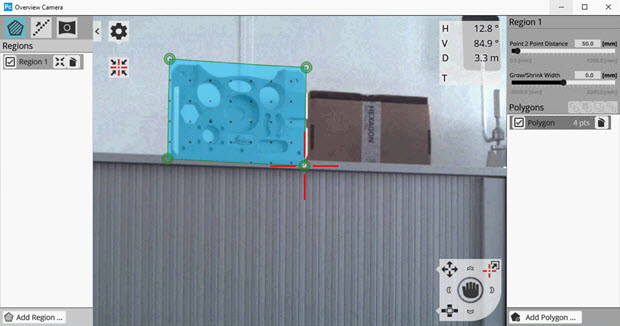
 Define
the Area Scan region and settings from the Overview Camera window.
Define
the Area Scan region and settings from the Overview Camera window.
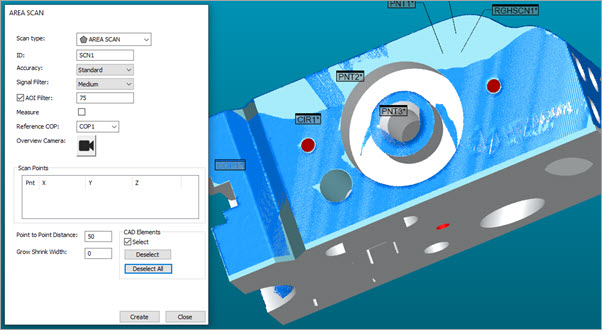
Define
the Area Scan regions when aligned to a CAD model.
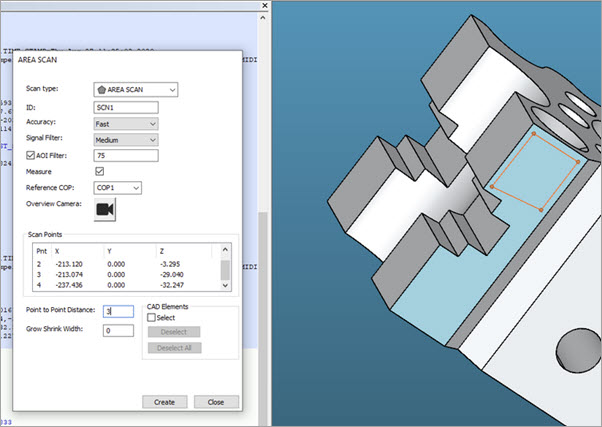
Perform
and Area Scan on selected CAD surfaces when aligned to a CAD model.
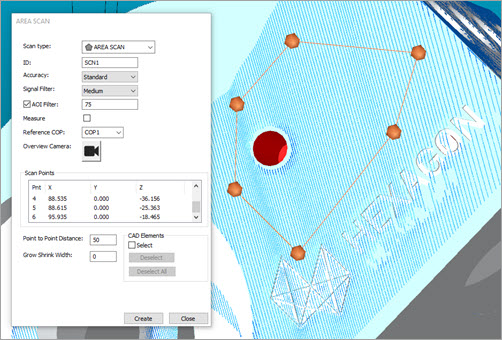
You can update the ID for your scan in the ID field or use the default name. This is the name of the scan command that PC-DMIS displays in the Edit window.
Select an accuracy option from the Accuracy Settings list of the Area Scan dialog box. The available options are: Standard, Fast, and Precise.
From the list, select the Signal Filter option.
Select the AOI Filter check box to enable this filter if necessary. Then type a valid value.
Select the Measure check box if you want to begin measurements immediately after you close the dialog box. As long as the definition exists on the CAD, this option is available when you run PC-DMIS in either Online or Offline mode.
From the Reference COP list, select a COP. This is where PC-DMIS stores the scanned pointcloud data.
Since PC-DMIS stores the data in a pointcloud, you must have a valid Reference COP ID defined in your measurement routine to create an Area Scan. If you don't select a COP from the list, or if you enter one that is not yet created, PC-DMIS displays a prompt to ask if you want to create a new COP.
From the Area Scan dialog box, click Create to add the Area Scan command into the Edit window. Then click Close to return to the PC-DMIS main screen.
Area Scan example
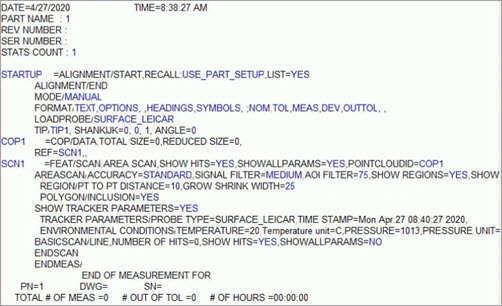
Example of the Edit window showing the Area Scan command with Region settings
PC-DMIS displays the scan's path points and their XYZ coordinate locations in the Scan Points area of the Area Scan dialog box.
More: