Creating and Configuring a Pallet Playlist
Similar to a playlist for music files, a playlist in
Inspect is a collection
of measurement routines that "play" (or execute) one after another.
With a pallet playlist, you can set up a grid of parts
for measurement. During execution, in each cell of the pallet grid, the
software executes a single routine. You can choose which routine each
cell executes when you begin the execution.
To begin, create
a playlist as usual and give it a name. If your playlist has more
than one part, PC-DMIS expects to find those parts in each cell on
the pallet.
From the playlist dialog box, in the Playlist Type list, choose Pallet
to show the Pallet Layout tab. The remaining
steps on this procedure use the Pallet Layout
tab.
Define the number of cells in pallet's grid
by defining the number of rows and columns:
Use the buttons on the right (or type in
the box) to define the number of rows.

Use the buttons on the bottom (or type
in the box) to define the number of columns.

Define the part offsets for the axes. By default,
the axes are X (across the grid's bottom) and Y (along the grid's
side). The axes appear red until you define the offsets:
Hover your mouse pointer over the red X
axis, and click the Part Offsets. Type
the part offset in X to the next part's origin, and press Enter.

Hover your mouse pointer over the red Y
axis, and click the Part Offsets. Type
the part offset in Y to the next part's origin, and press Enter.

When you type a non-zero
value for the axes, the red color goes away.
Set the start position (or origin):
Hover your mouse pointer over one of the
four corner cells that you want to be the start position. A large
white dot appears.
Click on the large white dot to set that
cell as the start position. You need to do this even if you want
to have the execution skip that corner cell.

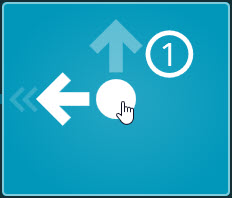
A number one, surrounded by a circle, indicates
the first cell. This is the start position:

Inspect
re-numbers the other cells.
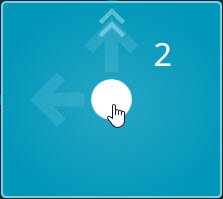
During execution, the probe goes first
to the start position at cell number 1, it then moves to cell
number 2, and then to cell number 3, and so on.
Set the direction:
Hover your mouse pointer over the corner
cell that you chose as the start position.
Click the white dot to change the direction
of the execution.

The large white arrow and the thick blue
lines and chevron arrows all update to indicate the new direction
the probe follows to measure the parts.
Turn off cells that you do not want to measure:
If you want the execution to skip any cells,
click on the blue background on that cell to turn that cell off.
A cell without a blue background is off.
You can click a background again to turn that cell back on and
show the blue background.
During execution, the probe moves above
any skipped cells, but it won't stop and measure within those
cells.
Ensure you have a working alignment for your
grid that matches your start position. You can do this in one of these
ways:
Then whenever you change
start positions, you can select the alignment file for that start position.
From the gear button ( ) near cell 1, choose Using
Pallet Alignment, and load your alignment file.
To create an external alignment,
measure the part once in the PC-DMIS software at that position. Then save
the routine out as an external alignment. If you need more information,
see the PC-DMIS documentation on external alignments.
From the gear button, also
define the Starting Offset values.
Option 2 - This option works with a single
measurement routine. In your routine, create a manual alignment
within the measurement routine for the part at the start position.
From the gear button ( )
near cell 1, choose Using Part Alignment.
With this approach, you must always use that start position. If
you do this, you do not need to choose an external alignment file.
The Run
Manual Alignment on First Part check box is available if your pallet
playlist only has one measurement routine. With this check box, Inspect only performs a manual
alignment on the first part in the grid. If you clear this check box,
it uses the existing manual alignment for each part. Be sure to manually
align each part to the first cell before you run the playlist.
If you need to define additional pallet settings
or actions, such as using a different alignment or offsetting the
start position by a certain amount, you can use the gear button near
cell 1. With the gear button, you can:
Change the pallet's axis reference
Define the alignment type (either pallet
or part)
Select an alignment file (for pallet alignments)
Set a starting offset (for pallet alignments)
For information on these
actions, see "Pallet Layout
Settings".
Click Save to save
the playlist and close the playlist dialog box.
Related Topics:
Pallet Requirements
Using
Pallet Playlists
Pallet Layout
Tab
Pallet
Layout Settings
Executing
a Pallet Playlist


 ) near cell 1, choose