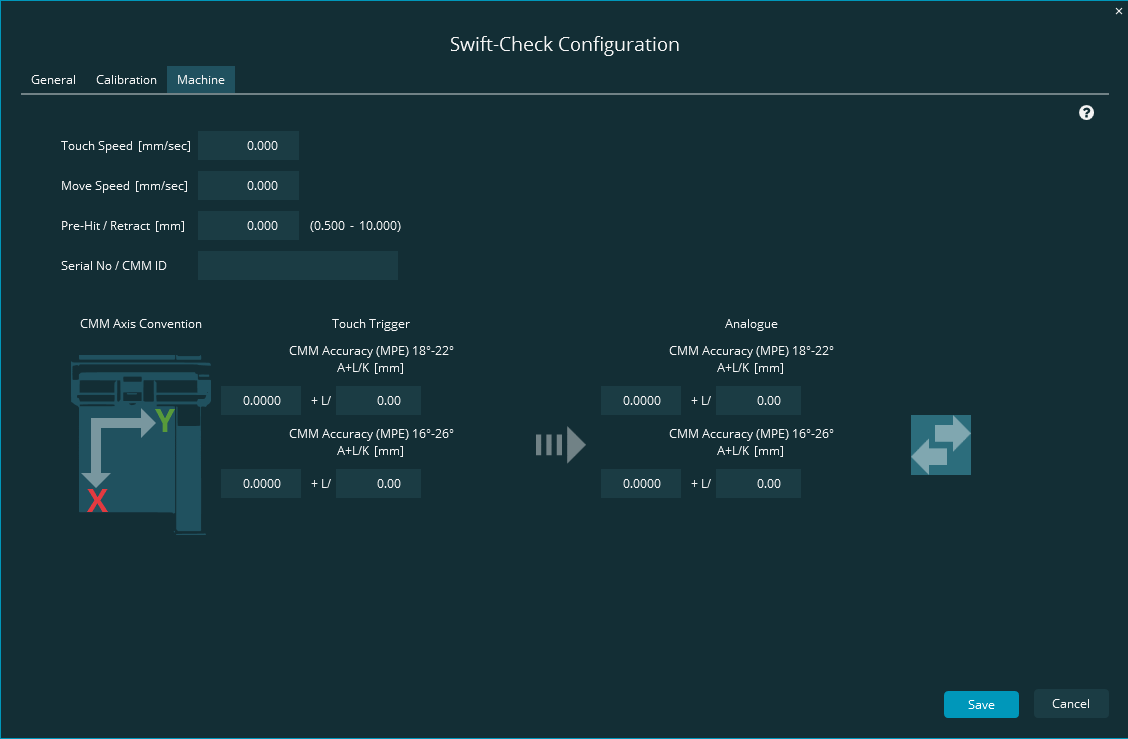
Machine Settings
Use the Machine Settings tab to define certain characteristics of your CMM.
Fill in the top half with some general information.
Fill in the bottom half with values related to your CMM's accuracy from your calibration certificate.
 |
You can find values for these from your software.
Touch Speed [mm/sec] - From your measurement software, locate the stated touch speed for your CMM. You must use the exact same touch speed that was used for your probe's calibration. In PC-DMIS, you can find this information from the Probe Utilities dialog box. Type the value in millimeters per second.
Move Speed [mm/sec] - Type your desired move speed here in millimeters per second. Inspect uses this value for the Swift Check tests.
Pre-Hit / Retract [mm] - Type your desired pre-hit and retract distance in millimeters. Inspect uses this value for the Swift Check tests.
Serial No / CMM ID - Type your CMM's serial number. This number appears on reports for traceability.
Notes
A slow Move Speed with a large Pre-hit / Retract value increases execution time.
A high Move Speed with a small Pre-hit and Retract value increases the likelihood for collisions.
When you run tests with the sphere artifact, be aware that on older CMMs that do not support circular moves, you may need to increase the Pre-hit / Retract value to avoid collisions.
You can find the values related to machine accuracy on your CMM calibration certificate.
Note
Machine accuracy values relate to ISO 10360-2. This ISO specifies the acceptance tests for verifying the performance of a CMM that measures linear dimensions.
CMM Axis Convention - On the screen, click the image of the machine until the axes match your CMM's configuration.

When you click this image, the software toggles the configuration between these two common conventions:
The X axis is across the CMM table (from left to right).
The X axis is down the CMM table (from rear to front).
For the values under the Touch Trigger and Analogue areas, type the stated accuracy values from your certificate. If the certificate only gives one accuracy statement, duplicate those values in both areas.
You may find these buttons helpful:

This button copies the values from the Touch Trigger area on the left to the corresponding fields in the Analogue area on the right.

This button controls the display formats for the Touch Trigger and Analogue areas. Each time you click it, it switches between these two formats:
A+L/K [mm]
A + B x L/K [mm]
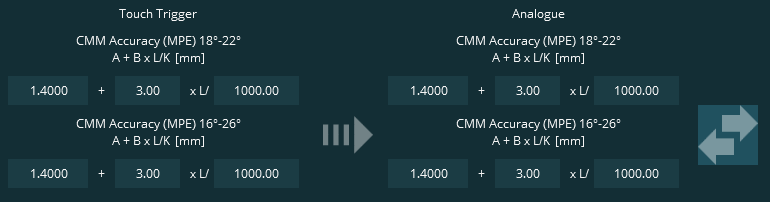
Suppose your certificate has "OEM Specification Eo, MPE: 1.4+3L/1000 (µm)", like this:
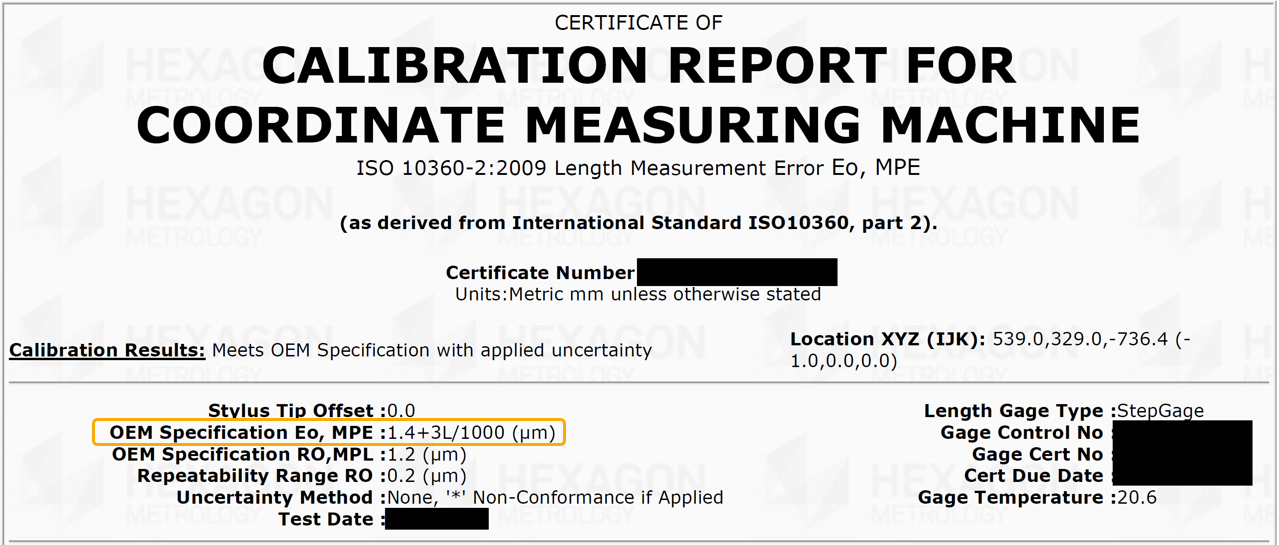
This indicates a format of A+ B x L/K.
In this case, you would type these values for both the Touch Trigger and Analogue areas:
1.4 for A
3.0 for B
1000 for K
Like this: