Setting Up Swift-Check
If you have Inspect 5.1 or later installed, you need to then install the Swift-Check add-on.
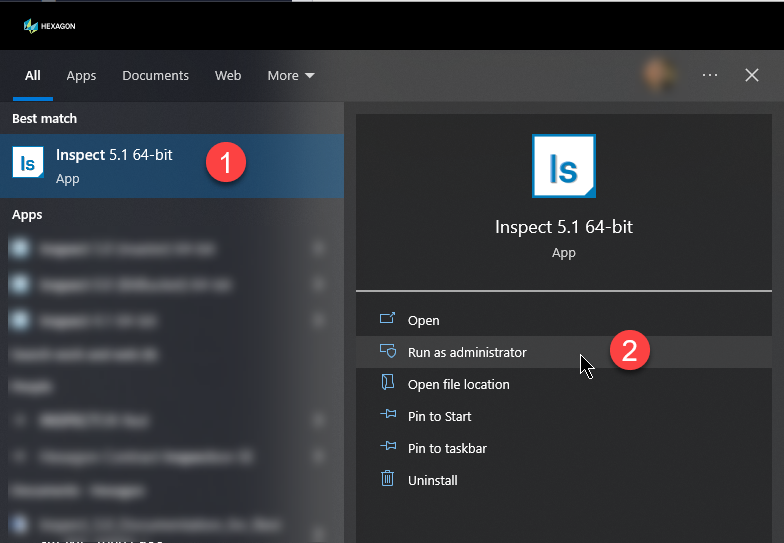
Press the Windows Start key and type Inspect.
From the Inspect app's shortcut icon, choose Run as Administrator.
Allow the app to run.
Install the Swift-Check add-on in one of these ways:
If you have already ran Inspect, use this method.
From the app's Home screen, from the left sidebar, near the bottom, choose Add-ons to access the Add-ons screen.

From the Add-ons screen, on the top-right, click Available to show any uninstalled add-ons.
Locate the Swift-Check add-on and click the Install button to its right.
The Install button changes to show Restart and Apply.

Click Restart and Apply to install the add on.
Once you have installed the add-on, you next need to configure it. For information, see "Configuring Swift-Check Settings".

 |
ITEM NO. | ITEM DISCRIPTION | QTY |
|---|---|---|
1 | Gauge Holder Plate | 1 |
2 | 300mm Length Bar | 1 |
3 | Heel Pin | 6 |
4 | Stand-off | 1 |
5 | 25mm Sphere | 1 |
6 | Nylon Washer | 7 |
7 | M4 x 8LG screw | 7 |
8 | Lock Down Knob | 1 |
9 | Washer | 1 |
10 | Gauge Holder | 1 |
11 | Ring Gauge | 1 |
To use the Swift-Check add-on for the first time, follow these steps.
Step 1 - Copy Files to Your Computer
You need to use a version of the Swift-Check measurement routine that is compatible with the version of PC-DMIS or QUINDOS that you intend to use. A USB stick with multiple versions of the measurement routine is available with your Swift-Check artifact. The folder names on the USB stick can help you locate a compatible measurement routine to use.
Before you start, note that PC-DMIS has the following compatibility restrictions:
Measurement Routine Schema Format | Compatible with PC-DMIS Version(s) |
|---|---|
2016 | PC-DMIS 2016 to 2022.1 (inclusive) |
2022 | PC-DMIS 2022.2 to 2027.2 (inclusive) |
Note
Folder names on the USB stick correspond to the schema format in the above table, and you can use them to find a compatible version. For example, this image shows a 2022 folder for PC-DMIS with the measurement routine and its associated CAD file.
 |
On the USB stick, navigate to the applicable PC-DMIS folder.
Copy the SWIFTCHECK.PRG and SWIFTCHECK.CAD to the Clipboard.
On your computer, paste the files to this folder that Inspect created when you installed the Swift-Check add-on:
C:\Users\Public\Documents\Hexagon\Inspect\SwiftCheck\PC_Dmis
On the USB stick, navigate to the applicable QUINDOS folder.
Copy the SWIFTCHECK.WDB file to the Clipboard.
On your computer, paste the file to this folder that Inspect created when you installed the Swift-Check add-on:
C:\Users\Public\Documents\Hexagon\Inspect\SwiftCheck\Quindos7
Step 2 - Build and Calibrate Required Probes
Before you can run the Swift-Check measurement routine, you need to build and calibrate (or qualify) the required probes. Your Swift-Check artifact is supplied with the following components:
Ø4x20mm M2 threaded Stylus
M3-M2 converter
M5-M2 converter
These components allow you to build a probe configuration that attaches to the probe head that your CMM uses.
Caution
Build your probe using only the styli and adapters that are supplied; do not use any additional extensions.
For PC-DMIS, Swift-Check supplies a usrprobe.dat file that contains the M5-M2 adapter definition. This adapter definition was not available in the standard component list in the PC-DMIS probe builder utility for versions before 2021.2.
If you are using a version of PC-DMIS between 2016 and 2021.1, from the USB stick, copy the usrprobe.dat file to C:\ProgramData\Hexagon\PC-DMIS\<version>, where <version> is the version of PC-DMIS you are currently using.
If you already have an existing usrprobe.dat file, open it in a text editor, and copy and paste the contents of the supplied Swift-Check into usrprobe.dat, appending the contents to the end of the file before saving it and closing again. Do NOT overwrite the contents of Usrprobe.dat, only append the contents.).
Note
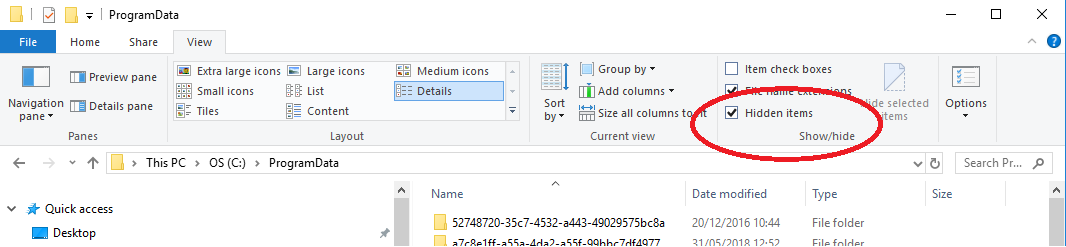
NOTE: ProgramData is a hidden folder, so you may need to show hidden items to locate it.
Notice
If you choose to upgrade your version of PC-DMIS, the PC-DMIS installer automatically copies usrprobe.dat to the new location.
If you are using PC-DMIS 2021.2 or later, you do not need to copy and paste the file. These versions already contain the M5-M2 adapter definition.
Once you are sure you have the MP-M2 adapter definition, continue with this procedure:
In PC-DMIS, open the Probe Utilities dialog box and create a new probe file. Name it SWIFTCHECK.
From the Probe Description area, select the relevant components to completely define the probe build, as you normally do when building a new probe file.
Click on Add Angles and add these angles:
A0/B0
A90/B0
A90/B90
A90/B180
A90/B-90
Calibrate your probe in the usual way and verify that the results are acceptable.
If you are using an analog (scanning) probe, be sure to also perform the additional scanning calibration. To do this, from the Measure Probe dialog box, Type of Operation area, select Calibrate ScanRDV.
View the results to verify that they are acceptable.
Execute a CLRALL command to start a new QUINDOS wdb.
Add five Qualify Tool commands.
In each command, type the name of artifact, head type, and sensor type, as you usually would.
For the probe diameter, type 4, and if you are using an analog (scanning) probe, select Additional Scanning Qualification.
The probe names and corresponding A-Angle and B-Angle for the five commands are these:
Tool Name=S_CHECK(1), A-Angle=0, B-Angle=0
Tool Name=S_CHECK(2), A-Angle=90, B-Angle=0
Tool Name=S_CHECK(3), A-Angle=90, B-Angle=90
Tool Name=S_CHECK(4), A-Angle=90, B-Angle=180
Tool Name=S_CHECK(5), A-Angle=90, B-Angle=-90
Execute each command in the usual way.
View the qualification results of each probe in the EDB View and verify that they are acceptable.